Trafalgar Law
- Name
- トラファルガー・ロー (Torafarugā Rō)
- Status
- alive
- Affiliation
- Heart PiratesSeven Warlords of the Sea
- Devil Fruit
- Ope Ope no Mi
- Bounty
- ฿3,000,000,000
- First seen
- Ch. 498
First seenCh. 498≈฿3,000,000,000Ch. 1081Last seenCh. 1081
“Surgeon of Death” Trafalgar Law · alive · captain, Heart Pirates · ฿200,000,000
Profile
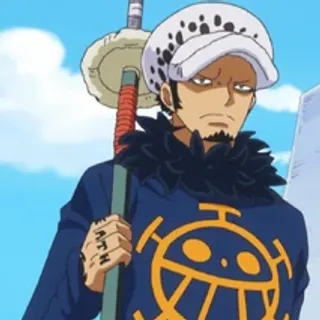
“Surgeon of Death,” captain of the Heart Pirates, from the North Blue. One of the Eleven Supernovas (see Eleven Supernovas). Debut caption Ch. 498 p. 18: bounty ฿200,000,000. Wears a spotted hat; sits with a sheathed nodachi.
Arc-by-arc updates
Winner Island — defeated by Blackbeard; the Polar Tang sunk (Ch. 1081)
- The Blackbeard Pirates finish the ambush begun Ch. 1063–Ch. 1064: the submarine Polar Tang is sunk and “the pirate Trafalgar Law and his Heart Pirates… defeated” (pp. 16, 19). Blackbeard wants Law’s Op-Op Fruit — to “sell” it or “use it” for eternal life (p. 18; the Immortality Operation). A Blackbeard pirate names what Law did at Rocky Port: “stole the hearts of a hundred pirates at Rocky Port” (p. 17).
- Law lies bleeding in the water as Bepo (in moonless Sulong) pleads with him not to die.
Post-Wano — Winner Island (Ch. 1064)
- Ambushed by Blackbeard at Winner Island; trades quake-scale blows (“Shock Wille,” “Amputate,” “K-Room”) and escapes via Warp while the Heart Pirates protect him and the Polar Tang (pp. 2-9).
New World — ambushed by Blackbeard (Ch. 1063)
- En route from Wano, the Heart Pirates’ submarine is crushed at depth by the Blackbeard Pirates; Law orders a surface-and-break-through, noting “those powers can’t withstand intense enough Haki,” and shrugs off Doc Q’s contagious feminization disease (pp. 10–12).
- Deduces the crew’s escalating powers come “through hunting down devil fruits!! No wonder their bounties just keep rising” (p. 13); on seeing Stronger’s Mythical Pegasus form muses “Of course, Kaido would have had at least one!!” (p. 14). See Blackbeard Multiple Fruits.
- Blackbeard descends on the winged Stronger and demands “winner takes all” — all of Law’s road poneglyphs; Law answers “Same back to you” (pp. 14–15). Cliffhanger. See Road Poneglyph, What is the One Piece.
Wano Country — Departure (Ch. 1057)
- Parts ways with Luffy as the Worst-Generation alliance dissolves — “See ya later, Traffy!” / “Shut up.” — sailing out of Wano on his own (p. 6).
Wano Country (Ch. 1056) — the alliance ends; Road Poneglyph rubbing
- At Tokage Port declares the alliance over (“we’re enemies now”); the three captains pick departure directions by a game (pp.12–13).
- Reveals he holds a rubbing of Kaido’s Road Poneglyph — “the same thing we took off Big Mom’s general” — and that taking part in the all-out war over the One Piece hinges on “the man with the burn scar” (p.16). See Road Poneglyph, The Man With The Burn Scar Holds The Road To The One Piece.
- (
last_appearance→ 1056.)
Wano Country — Sukiyaki’s chamber (Ch. 1055)
- Accompanies Nico Robin and Kozuki Sukiyaki into the secret chamber; impatient with the long climb (“How long will this take?”, p. 5); present for the Pluton / Road-Poneglyph reveal.
- (
last_appearance→ 1055.)
Wano Country — New Era bounty (Ch. 1053)
- New post-Wano bounty ~฿3,000,000,000 (p.5). In Udon with his crew; “This is gonna be trouble…” (p.5). See Four Emperors (Yonko).
Wano Country — castle aftermath (Ch. 1052)
- Coolly assesses their exposure now that the world will name new Emperors; “they can’t see us from outside the closed nation, either” (p.16); present for the new-bounty / new-”Emperors of the Sea” tease Apoo flaunts (pp.16–17). See Four Emperors (Yonko).
Wano Country / Onigashima (Ch. 1043)
Onigashima Raid — downs Big Mom with Kid (Ch. 1039)
- Warns Kid his stamina is spent — “the next round’s going to be the last one for me!!” — and coordinates one final exchange.
- Demonstrates the full giant form of his awakened Op-Op attack “Puncture Wille”: a colossal stacked-K-Room drill that pierces Big Mom and bores a vast hole down through Onigashima past the underground armory (pp. 14–15). Also uses “Takt” (p. 11). See Trafalgar Law, Ope Ope no Mi.
- With Kid, defeats the Yonko Big Mom.
Wano Country (Ch. 1038)
- With Eustass Kid keeps Big Mom from the roof; impales her with Kikoku (“Anesthesia!”) — “the penetration doesn’t hurt… the real pain is from…” — then discharges “Shock Wille!!!!” through the embedded blade, convulsing her (“Big Mom’s dead!!!”) (pp.13–15). (
Devil-Fruits/Ope Ope no Mi) - Sets up Kid’s finisher (Big Mom “being pulled” by Kid’s magnetism after the shock).
Wano Country — Onigashima Rooftop (Ch. 1031)
Wano — Onigashima, awakening confirmed vs Big Mom (Ch. 1030)
- Confirms his Op-Op Fruit has awakened when Kid asks — but “the stamina consumption is extreme, and it ensures I’ll lose the battle,” so he reserves it for “if I’m on my last legs” (p. 14–15). See Trafalgar Law, Ope Ope no Mi.
- Strikes Big Mom with “Anesthesia / Kroom” — “The penetration does nothing on its own… Kroom creates shock waves from within!!” — and “Wille / Shock,” drawing blood (p. 15–16).
Wano Country — Onigashima Raid, second floor (Ch. 1022)
- Continues the second-floor fight against Big Mom alongside Eustass Kid (p. 8).
Wano Country — Onigashima Raid (Ch. 1015)
Wano Country — Onigashima raid (Ch. 993)
Wano Country — Onigashima raid (Ch. 984)
- Surfaces the Polar Tang at Onigashima’s snowy rear with the rest of the Akazaya, then uses “Room” → “Chambres” to teleport them onto the island before diving back under (pp. 9–11). Bepo, Shachi, and Penguin crew the dive.
Wano Country — Onigashima approach (Ch. 982)
- Explains that the twisting currents mean a typical ship can only approach Onigashima from the entrance; wishes the alliance to fulfill Oden’s desire together (p. 10).
Wano Country — Onigashima landing (Ch. 978)
- On disembarking, Law sinks the alliance’s own ships — “We need no return ships!! We sink them before we go! On this mission… …or die!!!” — a deliberate no-retreat commitment that panics the less-resolute Straw Hats (pp. 7-8).
Wano Country — the real raid route (Ch. 977)
- Proposes the real raid route: take his submarine around the back by sea, avoiding the whirlpools that keep ships at bay, and use his power to land the strike force directly onto Onigashima (pp. 6-7). Insists on personally leading the troops in; the staging shows the alliance gathered aboard his sub (“this ship isn’t your garrison”).
Wano Country — the Worst-Gen barrage (Ch. 975)
Wano Country — arrives by sea with Luffy (Ch. 974)
- Arrives at the Tokage Port engagement (his submarine surfacing read as the “something on the seafloor”); stands with Luffy against the Beasts Pirates — “When you’re at sea… you fight against pirates!!” (pp. 15-17). Kanjuro confirms the “first plan leak wasn’t because Law’s subordinates squealed” (p. 11) — clearing Law’s captured crew of the blame.
Wano Country (Ch. 954)
- In the Flower Capital, confronts Kid about the dissolved Kid–Apoo–Hawkins alliance; cuts Kid’s restraints loose and secures him as a “willing participant” in the raid — “Six days until the raid on Onigashima” (pp. 4-6).
Wano Country (Ch. 951)
- Captured. Three of his Heart Pirates are released as “bargaining chips,” and Law’s relayed order to them is to keep his capture secret from the Straw Hats — “Don’t tell Straw Hat and the others that I’ve been caught!! … our captain’s life comes before the plan” (p.8–9). His crew is anguished and wants to act (p.9).
Wano Country (Ch. 950) — captured; the cliffhanger
- Captured and bound near the Flower Capital; interrogated to reveal “what you’re plotting here in Wano — ALL of it!!” and his “connection to the Straw Hat Crew” (p. 17) — chapter cliffhanger. The interrogator is drawn as Basil Hawkins.
Wano — Udon (Ch. 945)
- Cornered by Basil Hawkins at Udon; his caged crew (the “polar bear” Bepo, Shachi, Penguin) are held as hostages/voodoo-proxies, blunting his Room powers. Hawkins taunts “you’re going into that cage to join them” (pp. 7–8).
Wano Country (Ch. 940) — Flower Capital safehouse
- At the Flower Capital safehouse, doubts Shinobu’s loyalty and storms off; the others worry the plan has come apart (p. 2).
Wano Country (Ch. 938) — Ebisu Town hideout; defends his captured crew
- At the Ebisu Town hideout amid the scabbards’ paranoid infighting over the leaked operation; the scabbards suspect his captured crew (“that little bear and his friends must have spilled all the secrets”). Law defends them — “Bepo and the others would die before they talk!!” / “Don’t insult my crew!!!” — and is urged to keep cool (“That’s just what the enemy wants, Traffy!!!”) (pp. 7–8).
Wano Country (Ch. 936) — referenced; the enemy moves to lure Law out
- The enemy reports having captured the Heart Pirates (Bepo and crew), intending to use them — and the leaked waning-crescent ankle mark — to lure Law out, or “the entire city will plunge into chaos” (p. 15). Law himself is not shown.
Wano Country (Ch. 934)
- With the Heart Pirates, reads the Wano news via a “Smail” (smart snail): the funeral for Oiran (top courtesan of Wano) is tomorrow; Eustass Kid escaped jail; Basil Hawkins is in Wano in the same alliance as Kaido. Eager to “see Kid again.”
- (
last_appearanceadvances 0931→0934.)
Wano Country (Ch. 931)
- Recognizes Sanji’s Germa raid suit on sight (“that suit, of all things”); after the fight leads the group to flee and shelter in Ebisu Town, warning they should stay out of the capital to avoid more fuss (pp. 4, 10).
Wano Country (Ch. 930)
- Leads the disguised Straw Hats fleeing the Flower Capital manhunt; orders no fighting before the decisive battle unless “you’re absolutely positive you can win,” since each injury weakens them for the raid (pp. 12-13).
- Tells Sanji to ignore the soba-shop bait and move on; relieved that Page One doesn’t recognize him (pp. 16-17).
Wano Country (Ch. 929)
- Present in the Flower Capital with Sanji (the undercover “Soba Cook”) when the Tobi Roppo (X Drake, Page One) arrive; offers to fight them off and tells “Black-Leg” to hide (p. 17).
Wano Country (Ch. 924)
- Moves to intervene for Luffy but is pinned by Basil Hawkins’s “Straw Sword” — a sea-prism-stone nail driven through the straw voodoo-doll (“A sea prism stone… nail?!”) — paralyzing him via the Wara Wara no Mi link (pp. 3, 7).
- Worried about Bepo and the crew but unwilling to abandon “that idiot” Luffy; escapes Hawkins, who vows to track him down (p. 7).
Wano Country (Ch. 923) — tries to stop Luffy charging Kaido
- Present in Bakura Town during Kaido’s drunken dragon-form descent; tries to stop Luffy from charging the Emperor — “We don’t even know if Kin’emon’s crew, my crew or your crew… is alive and well at the moment!! …Are you trying to ruin our plans?!” (p. 7). Frets the reckless assault could blow the anti-Kaido alliance’s cover before the allied crews are even confirmed alive.
- Later seen observing among the murmuring Bakura Town bystanders (“Who’s that fella?”, spotted hat, p. 15) as Luffy’s Gear Fourth runs out.
Wano Country (Ch. 922)
- Recaps the stakes for the allies: Kaido makes weapons in Wano via the artificial SMILE fruits in league with Doflamingo and Caesar; the alliance destroyed the Punk Hazard and Dressrosa factories and jailed Doflamingo — so they picked this fight (pp. 3-4).
- Argues there’s “no point to the alliance” if anyone acts on emotion before “the big battle,” and tries to stop Luffy; orders the Heart Pirates to stay hidden (“just don’t show yourselves in public!!!”) (pp. 4-5).
- “You idiot… this is what comes of doing good things for people!!” as Luffy charges off (p. 10).
Wano Country (Ch. 921)
Wano Country (Ch. 920)
- Present at the survivors’ council at the Oden Castle ruins (final panel, p. 17). Recalled as the man who once cut Kin’emon to pieces on Punk Hazard and is “now on our side” (p. 15); the Heart Pirates are counted among the ~5,000-strong raid allies for Onigashima (p. 16).
Wano Country (Ch. 919)
- Disdains the Straw Hats’ charity (“Pirates doing nice things for people. Makes me sick,” p. 4); misleads Luffy that Kin’emon is “gone” (the stomach-trouble gag); the Oden Castle ruins are his base, with Bepo and the Heart Pirates hiding nearby (pp. 12–16).
Wano Country (Ch. 918) — the ronin of the Flower Capital; fights Hawkins
- Revealed embedded ahead of the crew as a ronin living in the Flower Capital; Hawkins notes “Roronoa’s over there, and HE knows the plan” (p. 7).
- Fights Hawkins at the Bakura Town entrance: uses ROOM and Chambres, feints a killing blow, then declares “Murder isn’t my style. I am a doctor. …It was just a bluff.” (pp. 7-10). See Ope Ope no Mi.
- Confirms he crossed the disguised Straw Hats earlier and expects Hawkins to try to silence him before “your entire alliance is in the country”; references their last meeting at Sabaody (p. 10).
- Reunites with Luffy (“Oh, hey, Traffy”) amid the barge raid; warns “This is a rebellion against Wano” and that the Beasts will now come for real; leads the group up to the ruins of Oden Castle to meet “the ghosts of Wano” (pp. 11, 15, 17). See The Ghosts Of Wano Are Graves Bearing The Names Of Living Men.
Wano Country (Ch. 916)
- Present in Wano. Over a Den Den Mushi he warns a Heart Pirates subordinate off the man “with a straw hat around his neck” (Luffy) — “He’s far beyond your ability… do not engage him” — and says “I’m on my way now” (pp. 11, 19). A Heart Pirate is dying after eating fish from the poisoned river despite Law’s warning (offers to “give the baboon back”). See Heart Pirates, Kaido’s Factory Poisons The Rivers Of Wano.
Wano Country (Ch. 914)
- Present in Wano with the Heart Pirates; spots the disguised Luffy and Zoro heading into Bakura Town (p. 17): “He’s going to cause nothing BUT trouble!!! …We’ve got to stop those idiots!!” Rushes to intercept (“Straw Hat’s in Wano?!”).
Zou — the split; the poneglyph-rubbing request (Ch. 820)
- Will take the Heart Pirates’ submarine to Wano to “look into Kaido’s poneglyph”; offers to ferry the Wano group safely (pp. 13–16).
- Asks Luffy: “If you should happen across any poneglyphs, bring me a rubbing, please.” (p. 16) — a chekhov-explicit instruction. See Law Asks Luffy For Poneglyph Rubbings, What is the One Piece.
Zou (Ch. 819) — joins the alliance against Wano’s Shogun and Kaido
- Kin’emon formally asks Law to join the fight against the Shogun of Wano and Kaido; Law assents, extending the Heart Pirates role in the new Ninja-Pirate-Mink-Samurai Alliance (pp. 7, 13–14).
Zou (Ch. 818) — reacts to the Emperors owning Road Poneglyphs; SBS: the Polar Tang
- Reacts with Zoro to the reveal that pirates (the Emperors) already hold two of the four stones (“Pirates?!”) (pp. 8–9).
- SBS (Vol. 82, p. 18): his submarine is named the Polar Tang; his listed hobbies are “wandering, collecting commemorative coins.”
Zou — likened to Oden; the whale’s “voice” (Ch. 817)
- At Zou with the group climbing the whale-tree; the mink dukes remark his disposition is similar to Lord Oden’s (p. 11). Present for the red-poneglyph and Raizo reveals.
- See A Voice Grows Louder Near The Zou Whale.
Zou — Heart Pirates introduced (Ch. 815)
- Formally introduces his full crew, the Heart Pirates (“twenty strong”), to Luffy (p. 12). Brushes off his crew’s grievance — “It’s just an alliance. No one said you had to be friends.”
- Reminds everyone the alliance’s real fight is the Emperor Kaido — “wait on this whole fighting Kaido thing for a bit… I’m going to get him” — and that it is only a matter of time before Kaido invades Zou (p. 13). See Law’s Alliance Plan Targets A Yonko Via The Punk Hazard Key.
Zou (Ch. 807)
- On Zou, in the forest (“He’s in the forest… the Bear Forest!!”). Reunites with his Heart Pirates; deflects a mink’s praise about Doflamingo (“That wasn’t me, straw hat…”) (pp. 6, 15).
Zou (Ch. 806)
- In Kurau City with Zoro and Robin during the rain-ruption flood (among the sharks washed in with the seawater); deduces the flood is “an ordinary occurrence” and presses to find everyone and leave the island fast (p. 6).
Zou voyage (Ch. 802)
- Travels to Zou with Luffy’s group; his vivre card (his Heart Pirates crew is on Zou) guides them through the mist; explains the island can’t be tracked by Log Pose because it isn’t land, and that Black-Leg’s team may have arrived first (p. 13–15).
Dressrosa (departure) (Ch. 801)
- Bounty raised to 500,000,000 (Bartolomeo “threw the old one out”) (p. 15); sails with the Straw Hats for Zou.
Dressrosa — among the allies at the Sons’-Cups founding (Ch. 800)
- Present in the alliance group as the seven Colosseum captains pitch the Grand Fleet to Luffy; reacts deadpan to Luffy’s refusal of the cup — “What…? What the hell is he talking about…?” (p. 5). Among the assembled allies at the Sons’-Cups founding/feast (p. 13).
Dressrosa — Doflamingo’s fall (Ch. 791)
- Reaction shot at the underground trade port to the explosion / the Birdcage’s dissipation (pp. 4–5).
Dressrosa (Ch. 790)
- At the Royal Plateau as the Luffy–Doflamingo fight reaches its climax; shown (cow-print hat) amid the falling rubble near Rebecca (p. 6).
Dressrosa — takes over guarding Luffy (Ch. 788)
Dressrosa (Ch. 785)
- Watches Luffy’s Gear Fourth from the sidelines: “So he still had a secret up his sleeve… but he’s using too much Haki” (p. 3) — first read on the new form’s Haki cost / time limit.
Dressrosa — flower field, arm reattachment (Ch. 784)
- In the flower field outside the palace, the dwarves work to reconnect his severed arm (cut off by Doflamingo); replies “Yeah, I know. I’m a doctor” (p. 5).
- Frames the geopolitical stakes to the people: even if Doflamingo falls here, “great waves will spread throughout the world,” and Dressrosa’s people will be the “eye of the storm.” Says his “epiphany” came when he saw the underground trading port — “that’s the plan” (p. 5). See Defeating Doflamingo Sends Waves Across The World.
Dressrosa (Ch. 783)
- Gravely wounded (severed arm) and carried by Luffy; regains consciousness mid-rescue (pp. 4, 13).
- Reveals he has lived the past 13 years for the single purpose of striking Doflamingo down, and insists on staying to watch the fight to its end (p. 13).
- Tells the others to leave him — if Luffy loses, he wants to die alongside him; entrusts “the rest” to Straw Hat (pp. 13–14).
Dressrosa — downed but turns the Trebol fight (Ch. 782)
- Wounded and unable to move (still bleeding from Doflamingo’s @0781 shot), but conscious and goading: tells Trebol “I’m a captain too… I won’t have much dignity if I have to leave” (p. 16).
- Deploys his Room and uses “Takt” to launch a sword — “Sterben Blade” — that pierces Trebol and makes him bleed, the first hit to break Trebol’s pseudo-intangibility (pp. 16–18).
- Calls Trebol “Doflamingo’s clownish puppet” (p. 15), provoking the officer’s rage.
Dressrosa — present: Gamma Knife & the Corazon reckoning (Ch. 781)
- Inside a ROOM “so large you can’t actually see the border” — staged “all for this moment, this strike,” at an admitted cost to his own life — Law lands Gamma Knife, which ruptures organs without external wounds (pp. 9–12, 15). Doflamingo first dodges into a string body-double (“CHAMBRES! …he missed the sure kill!!”), but the real strike connects.
- Presses his grudge over Corazon (“when your own brother Cora tried to stop your madness, you killed him”); when Doflamingo says he is glad he killed him, Law fires Counter-Shock — “You were the one who should have died that day!!! / Die, you devil!!!” (pp. 16–17).
- Doflamingo survives by self-repairing his organs with his strings, then whips Law down (p. 19) — leaving Luffy to charge alone. Trebol’s interjection is blocked by Luffy (“Stay out of this!!!”, p. 16).
Dressrosa — “The Heart Curse” (Ch. 780)
- Flashback (“the palace, several minutes ago”): downed and bleeding, Law is told his whole life by Doflamingo — born in the “hell of the White Town,” thirteen years lived on “hatred and the promise of revenge” since meeting Corazon (p. 2–3).
- Doflamingo offers a deal: perform the Op-Op Fruit’s Immortality Operation on him before dying, for “whatever you desire.” Law feigns acceptance (“All right… I’m in”), then reverses it — demands Doflamingo bring Cora back to life, says he can’t stop the Straw Hats or reclaim Caesar, and fires on him (p. 4–5).
- Doflamingo presses why Law wears the Corazon heart symbol, named his crew the Heart Pirates, and won’t take the “heart throne” — “so why do you wear the heart, Law?!” Law: “Law… Corazon!!!” Doflamingo: “Your curse… ends here!!!” (p. 6–7).
- Present day: Luffy finds Law’s blood-soaked body rolled to him (“what’s all this blood from?! what happened to your arm?!”); Doflamingo insists “he’s dead!! Traffy!!”; Luffy refuses to believe it (p. 14).
Dressrosa — present: outmatched by Doflamingo on the plateau (Ch. 769)
- Presses Doflamingo with “Scalpel!!”/“Chambres!!” but is parried at every turn (Spider’s Web) and cut down by String Saw (p. 9). Doflamingo taunts that Law let his feelings for Corazon override the colder plan (pitting Kaido against Doflamingo).
- Recalls Corazon’s message (“this little tube can save a place called Dressrosa… I’ll take it from here”) (p. 6). About to be executed at gunpoint when Luffy’s Jet Gatling crashes in (p. 10). Doflamingo cites Law’s “D.” and “the other D” (Luffy) as having drawn Law into a personal confrontation. See Will of D.
Dressrosa — atop the plateau vs Doflamingo; “I’m a D too”; shot (Ch. 768)
- Present-day, atop the New Royal Plateau vs Doflamingo. Opens on his resolve: freeing himself = stopping Doflamingo = fulfilling Cora’s hope (p.2).
- Needles Doflamingo over learning “today” he was a Celestial Dragon, over Luffy, and over “the D”; declares “I’m a D too” (pp.3–5) — first time he wields the hidden “D.” openly against Doflamingo.
- Uses “Chambres” (room-swap, p.3) and charges an “Injection Shot” (p.15); is overpowered — struck down (p.5) and shot by Doflamingo (“Shot!!”, p.15).
- Title reveal as resolve/motive: “Cora was too kindhearted to pull the trigger that day… so I’ve come to do it for him” — his mission is to finish Corazon’s failed kill (p.15). (Doflamingo’s defeat is forward (~0790) — recorded as Law’s motive only.)
- Cross-link Will of D, D, Celestial Dragons, Law Cries Out Cora Under Doflamingos Guns.
Corazon flashback — Corazon’s death; “I LOVE YOU” (Ch. 767) — flashback (~13 yrs pre-Dressrosa)
- A sick, dying child: Corazon feeds him the Op-Op Fruit and hides him in a treasure chest, silencing him with the “Calm” field and telling him “I LOVE YOU!!” (p. 13).
- Cured of his Amber Lead death sentence (“overcame his fate… he would die within three years”) and set free (pp. 14, 16).
- Witnesses Corazon’s death; screams as the silence wears off amid the explosions (pp. 16–17). The root of his lifelong vendetta against Doflamingo. Pays off the present-day “Cora!” cries Ch. 725/Ch. 729.
Corazon flashback — Law eats the Op-Op Fruit; the report delivered to Vergo (Ch. 766) — flashback (~13 yrs pre-Dressrosa)
- As a dying child, Law is force-fed the Op-Op Fruit by Corazon (stolen from Diez Barrels, worth ฿5,000,000,000) — the origin of his devil-fruit power; he protests “just because I eat it doesn’t mean it’ll cure my disease” (Amber Lead Syndrome) (pp. 4–6).
- Corazon, shot, gives Law a report tube to deliver to a lone Navy scout on the west coast, saying it can “save a kingdom called Dressrosa”; Law delivers it and begs the officer to save Corazon (pp. 7–9).
- The officer is secretly Vergo, the family’s Navy mole, who crushes the report and beats Law; Vergo notes Law is “from White Town” (Flevance) (pp. 10–13).
Corazon flashback — illness accelerates; “I’m NOT a navy man!!!” (Ch. 765)
- Young Law’s illness is accelerating ahead of schedule — he collapses with a fever though “it hasn’t been three years yet”; Corazon begs him to last three more weeks for the cure (p. 9). See Amber Lead Syndrome.
- Reveals the root of his hatred for the World Government: it knew everyone in Flevance would die from the lead yet forced them to keep mining it for profit, then “the government killed” his family and the rest of Flevance (p. 10).
- Declares “I’m NOT a navy man!!!” — unwittingly mirroring Corazon’s own hidden allegiance (p. 10).
Corazon flashback — Flevance origin, the “D.” lore, and the cure quest (Ch. 764)
- From Flevance, the White Town; afflicted with White Lead Disease, believed contagious, with ~a year to live. He had joined the Donquixote Family to “kill everyone and everything” before he dies (p. 9). Flashback: his doctor father begged soldiers to spare him during the Flevance massacre; child Law swore to survive and hunt down the killers (p. 6).
- Corazon reveals Law’s “D.” — “the People of the D,” “the enemies of the gods” (pp. 7–9) — and urges him not to become a monster like Doflamingo. See Will of D, D, Corazon’s Dread of the D Marks Law’s Hidden Lineage.
- Threatens to expose Corazon to Doflamingo, then quietly decides to stay silent, squaring his two-year-old debt for stabbing Corazon (p. 11). Extorts Baby 5 for 500 berries; coughs blood (“the law of blood,” p. 10).
- Abducted by Corazon for a six-month hospital quest to find a cure; calls him “Cora” (pp. 12–19).
Corazon flashback — Donquixote-Pirates era; inducted + the “D.” revealed (Ch. 763)
- As a dying child (Amber Lead Syndrome, ~3 years to live, white patches spreading, p. 11/p. 15), Law had stabbed Corazon and fled toward the port; recaptured, he is brought before Doflamingo (p. 10).
- Rather than punish him, Doflamingo makes Law an official member of the Don Quixote Family and names him his intended right-hand man “ten years from now” (pp. 10–11). Trebol prizes the “dirty glare” in his eyes as “potential” (p. 11).
- Law clings to the Family’s black-market devil-fruit dealings as a possible cure for his White Lead Disease (p. 11).
- Pestered by child-officers Baby 5 and Buffalo, Law gives his full name on-page for the first time: “Trafalgar D. Water Law” — the “D.” an alias, “Water” a secret family name carried “for generations” (p. 16). He had bribed Buffalo with ice cream to keep quiet about stabbing Cora (p. 10, p. 15). See Will of D, D.
- The instant Corazon hears the “D.”, he hauls Law away and speaks for the first time, warning him to get away from Doflamingo immediately (p. 17). See Corazon’s Dread of the D Marks Law’s Hidden Lineage.
Dressrosa — sole survivor of Flevance; the White-Town origin (Ch. 762)
- Revealed as the sole survivor of Flevance, “the White Town” of North Blue — his homeland, destroyed when it fell to the white-lead war (pp. 4, 13–15).
- His family were doctors (his father “the best doctor in the country”); his little sister Lammy and both parents died. Law survived by hiding in a mound of bodies and crossing the border. Adds Trafalgar.
- Carries White Lead Disease — pale/blotchy skin, fated to die in childhood (pp. 3, 13).
- Age 10, has no Devil Fruit (“a measly runt without powers”); newly taken into the Donquixote Family at Spider Miles ~a week prior, placed under Corazon (p. 2).
- Nihilistic and suicidal-aggressive (“I’m not afraid to die”); at chapter’s end he stabs Corazon, breaking Doflamingo’s “law of blood” (pp. 16–17).
Dressrosa — “the reason I’m alive is CORA”; the Spider-Miles flashback opens (Ch. 761)
- Badly wounded by Doflamingo in the palace (“DRIP DRIP”), but fights on alongside Luffy; reveals he is strapped with bombs and that he learned his teammates’ skills (“Gladius’s artillery, Lao G’s martial arts, Diamante’s sword”) yet used them “to take you all down” (p. 10).
- Declares “the reason I’m alive now is CORA” (p. 10), opening his backstory; asks Doflamingo how a fallen Celestial Dragon still wields government power (p. 7).
- Flashback (North Blue, 16 years ago, Spider Miles): a young, nihilistic Law bargains his way into the Donquixote Family under Diamante & Trebol; he has only 3 years and 2 months to live (read his own medical charts — “we ran a clinic before I became an orphan”) and wants to spend it “killing as many people as I can and destroying everything.” On meeting Corazon, he is immediately attacked (pp. 11–16).
Dressrosa — palace top; powers blocked, snared by Trebol (Ch. 760)
- Fights Doflamingo at the palace top. His Op-Op powers are disabled by Doflamingo’s Radio Knife for a few minutes (the cut body reattaches).
- Uses Injection Shot with his sword against Trebol (p. 8), but is caught and trapped in Trebol’s sticky snot (“Fall-bright,” p. 9) until Luffy yanks him free (p. 10).
- Doflamingo singles him out — “Do you remember my least favorite thing in the world… Law?!” — implying their shared past (p. 11). See Doflamingo Raised Law Like A Little Brother Shared Past.
Dressrosa — the secret-plan combo vs Doflamingo (Ch. 759)
- Coaches Luffy to stay calm — “Doflamingo is callous and calculating; he’ll seize the tiniest instant of weakness.”
- Doflamingo tells him that, but for “that incident” thirteen years ago, he’d be standing here “as the third Corazon”; Law retorts that but for that incident he “would never have come back for revenge” — his vendetta tied openly to the shared past (p. 10). See Law Cries Out Cora Under Doflamingos Guns, Trafalgar Law Was Joker’s Heart In The Donquixote Family, Doflamingo Raised Law Like A Little Brother Shared Past.
- Slashes Doflamingo’s string body double with Black Knight (p. 10), vows “I’ll take the real one,” and finishes the secret-plan combo with Radio Knife on the real Doflamingo (p. 17) — after Room/Chambres swaps positions so Luffy’s Red Hawk lands first.
Dressrosa — Chambres into the palace; squares off vs Doflamingo (Ch. 758)
- Uses Room + Chambres to swap himself and Luffy past the enemy line into the palace’s pool courtyard; the operation drains his stamina because he is already shot full of lead bullets (“Just did an operation…”, p.4-5).
- Climbs to the top floor with Luffy and squares off against Doflamingo “for the final battle” — “Ditto.” (p.16-17).
Dressrosa — climbing with Luffy to Doflamingo (Ch. 757)
- Climbs the barrier staircase alongside Luffy (still cuffed to him) toward the palace; reaches the fourth step where Doflamingo waits. The alliance asks “Can I leave Doflamingo up to you?!” / “Of course!!!” (pp. 3, 17).
Dressrosa — climbing with Luffy (Ch. 756)
- “Traffy” is with Luffy’s group on the plateau (“Luffy, Traffy!! Here you are!!”); frustrated he lacks “the key to these stupid cliffs,” he presses on with the split team toward the palace (pp. 15–17).
Dressrosa — “I was saved!!”; the White-Town flashback (Ch. 752)
- Held by the Doflamingo decoy, the wounded Law refuses the comparison — “I have no intention of turning out like you!! I was saved!!” (p. 5) — prompting Doflamingo’s “By who, my brother Corazon?!”
- Flashback (pp. 16–17): a dying child “raised in the White Town,” strapped with bombs and out to “destroy everything,” begs into the Donquixote Pirates because he “doesn’t have much longer to live.” Doflamingo foresaw him as a future right-hand man.
- Freed by the Tontatta when the marionette unravels; Luffy carries the fight up the plateau.
Dressrosa (Ch. 751)
- Still shackled in sea-prism-stone cuffs and chained to Luffy as they ride Moocy up the mountain; insists they turn back to find the key — “If I stay shackled in sea prism stone, we might as well be marching to Doflamingo to die… either we win or we die!!” (pp. 13–14).
- Learns over the snail that Viola found the key to his cuffs (p. 16); ends the chapter staring down the flooded dead-end where Doflamingo waits (p. 17).
Dressrosa (Ch. 750)
- Still seastone-cuffed beside Luffy on the plateau climb; a gladiator faction declares it must seize the alliance’s wanted “convicts” to survive Doflamingo’s bounty game. Law: “I do not blame you for your choice… but it means that I must make even more haste!!” (p. 6).
- The key to his cuffs (recovered by Viola) is now being routed toward him via Rebecca.
Dressrosa — the truth behind the alliance: the Corazon reveal (Ch. 749)
- Catches up to Luffy on Pica’s stone back; concedes “fighting is our only means of survival now” (p. 16).
- Reveals the alliance plan he brought was “designed to crush Doflamingo in a longer, more roundabout way,” but the truth is personal (p. 16).
- Tells Luffy that thirteen years ago Doflamingo murdered someone Law loved — “the one… who gave me my life”: Corazon, once a supreme officer in the Donquixote Family and Doflamingo’s younger brother (pp. 16–17). His core revenge motive, stated on-page for the first time. See Law Cries Out Cora Under Doflamingos Guns.
Dressrosa — wounded after Pica’s scattering (Ch. 748)
Dressrosa — fleeing the hostile crowd; “Big Brother Law” (Ch. 747)
- Still handcuffed to Luffy, flees with Zoro as the crowd IDs “Trafalgar Law and the Pirate Hunter… Straw Hat Luffy”; “If these cuffs ever come off, I’m killing YOU first, Straw Hat” (p. 13).
- The younger Donquixote officers (Buffalo, Baby 5) recognize him as their “Big Brother Law” — on-page confirmation he was raised inside the family (p. 12). See Doflamingo Raised Law Like A Little Brother Shared Past.
Dressrosa — the Kaido-clash calculus; on the manhunt board (Ch. 746)
- On Doflamingo’s manhunt board, captioned “Captain of the Heart Pirates, Seven Warlords (for now), Surgeon of Death.”
- Reveals the alliance’s original calculus: “The plan was to leave Doflamingo alive so he would wind up clashing with Kaido.” Taking Doflamingo down now means “Kaido’s rage at losing his SMILE fruit… will be turned on us instead!! We’ll be up against a furious Emperor!!!” See Taking Down Doflamingo Now Will Turn Kaidos Wrath On The Alliance.
Dressrosa — freed from sea-prism cuffs; ends the alliance (Ch. 744)
- Held in sea-prism handcuffs by Buffalo / Baby 5 at the palace; Luffy unlocks the cuffs (the sea-stone makes them “extra-tough”) (pp. 16–18).
- Declares “our alliance is finished!! …with the alliance finished, we’re enemies again!! set me free, and I’ll kill you!!” (p. 18).
- Doflamingo addresses him while resolving to use the Birdcage (“Won’t I, Law…?”, p. 19).
Dressrosa — captive in the palace; “the alliance is no more” (Ch. 740)
- Held captive in the palace’s suit chamber (still breathing — “at least Traffy’s breathing”), interrogated by Doflamingo and Trebol (pp. 15–16).
- Declares “The alliance is no more.” (p. 16).
Dressrosa — carried off; the decoy revealed (Ch. 730)
- Felled by Doflamingo and carried off by Kin’emon as the Straw Hats flee (“They’ve taken Sir Law away!!”); the Marines, alerted to “Trafalgar Law, Warlord of the Sea,” move to recapture him and Zoro (pp. 2–4, 11).
- Retroactively framed by the crew as having fought Doflamingo as a decoy — to move the alliance’s “three cards” (Caesar, the SMILE factory, Momonosuke) away from the enemy (pp. 15–16).
Dressrosa — the Iron Bridge duel; shot at the colosseum (Ch. 729)
- Duels Doflamingo on the Iron Bridge near Dressrosa — “Scalpel,” Room cuts (Ope Ope no Mi) against Doflamingo’s strings / “Bullet String” (pp. 3–5); takes heavy damage.
- Confronted that his fight is a decoy to pull Doflamingo off the SMILE factory; answers defiantly “The ‘D.’ will always cause another storm!!!” (p. 7). See Will of D.
- Overtaken at the Corrida Colosseum and gunned down by Doflamingo’s Bullet String in front of Luffy (pp. 15–17); cries out “Cora…!!” as he falls. See Law Cries Out Cora Under Doflamingos Guns.
Dressrosa — confronting Doflamingo (Ch. 725)
- Still clashing with Doflamingo atop the palace plateau. Doflamingo mocks the family’s loyalty and the captured Giolla; Law answers, “I’m not lashing out… I’m fulfilling someone’s long-held desire!! …I’ve lived to see this day!!” (pp. 2–3). Record only the hedged dialogue. See Doflamingo Raised Law Like A Little Brother Shared Past.
Dressrosa — “Law’s Plan”; the bridge gambit & the SMILE-factory reveal (Ch. 724)
- On the Greenbit–Dressrosa bridge, uses “Chambres”/“Room” (Ope Ope no Mi) to teleport Sanji’s group and the captive Caesar onto the Thousand Sunny, saving Sanji from Doflamingo’s string web.
- Reveals he had Caesar’s heart the whole time; hands the crew their charge and orders them to take Caesar and sail for Zou immediately (references the vivre card he already gave them).
- Reveals “Law’s Plan”: the alliance was only ever a lever to shut the SMILE factory; once Doflamingo can no longer supply Kaido with SMILE, “Kaido will finish the job for me.”
- Calls Doflamingo “Joker” and frames the fight as settling their “score from 13 years ago.”
Dressrosa — Greenbit; the heart bluff & the bridge gambit (Ch. 723)
- Faces Doflamingo and Admiral Fujitora on Greenbit; reveals the heart he’d held over Doflamingo all day was a fake — a sailor’s, not Doflamingo’s — and demands “Well, Heavenly Demon?!” (pp. 11–12).
- Uses Room (p. 12) and Chambres (p. 13) on the connecting bridge (Ope Ope no Mi). His plan (p. 16 map): draw Doflamingo onto the Greenbit–Dressrosa iron bridge, shoot Caesar across to the Sunny, and fight Doflamingo there to buy the ship escape time.
Dressrosa — Greenbit; Doflamingo’s world-founding monologue (Ch. 722)
- Faces Doflamingo and Admiral Fujitora on Greenbit; the audience for Doflamingo’s “let me tell you a tale… over eight centuries old, Law” world-founding monologue — the twenty founding kings, the Celestial Dragons, and the Donquixotes as Dressrosa’s original royal family (chapter header p. 18: “Law vs. Doflamingo & Admiral Fujitora”; monologue pp. 18–20).
Dressrosa — duel on Greenbit; the alliance “is over” (Ch. 718)
- Trades blows with Doflamingo on Greenbit but lands nothing — Doflamingo shrugs the attacks off (“none of this resistance amounts to anything”). On the Den Den Mushi, Law abruptly offloads Caesar onto the Straw-Hat crew (“I’m leaving Caesar with you!!!”) and orders Chopper to bring the ship to Greenbit “right now,” then hangs up (pp. 15–16).
- Doflamingo reveals the Corrida Colosseum tournament was bait to trap Luffy (“your partner has already fallen for the bait I set”), demands Caesar’s heart back, and tells Law “your alliance is over” (pp. 16–17).
Dressrosa — Green Bit standoff (Ch. 713)
- Holds Caesar Clown hostage at the Green Bit bridge and rebuffs Buffalo/Baby 5’s grab: “You didn’t follow the terms of the deal, Doflamingo!!! Everything’s off the table now!! You get nothing!!” (p. 2).
- Doflamingo addresses him as a former subordinate — “the boss you haven’t seen in over a decade” (p. 3) — the first on-page tell of Law’s hidden Donquixote past. Seeds Law Once Served Under Doflamingo As Joker.
- Cornered by Fujitora: his punishment turns on whether the alliance is real (if allied → arrest Law AND the Straw Hats). Law stalls by publicly affirming it: “we have an ALLIANCE!!! Straw Hat and I are EQUALS in this matter!!!” — thinking “Gotta buy some time” (pp. 4-5).
- Survives Fujitora’s meteorite “test,” left standing on a bare pillar (pp. 6-11).
Dressrosa — Confronts Joker on Greenbit (Ch. 712)
- Parts from Robin/Franky (“best of luck”) and goes to face Doflamingo alone on Green Bit (pp. 13-15).
- Realizes his ultimatum was undone — the World Government retracted Doflamingo’s resignation. Calls him “Joker”; rejects Doflamingo’s logic; ”…I guess I just really, really wanted to kill you!!!” (pp. 15, 19). Told he “knows nothing of Joker’s past.”
Dressrosa (Ch. 711)
Dressrosa (Ch. 710) — crosses to Greenbit; conserves stamina for Doflamingo; the wrecked Navy ship
- Leads the Caesar hand-off team across the bridge to Greenbit as the “Warlord of the Sea,” but refuses to fight — “My powers sap my stamina the more I use them!! … I have to conserve all the strength I can!!” — saving himself for Doflamingo (p. 8).
- On Greenbit he finds a wrecked Marine battleship; disclaims arranging it (“It’s sheer coincidence… How would I be able to control the Navy?!”) while wearing a “wicked look” — extends his concealed-agenda thread (Law’s Concealed Agenda Behind The Warlord Mask, pp. 14–16).
- Splits the team: stays at the beach guarding Caesar; sends Robin/Usopp into the forest as backup (p. 16).
Dressrosa (Ch. 705) — referenced (“Traffy”)
- Addressed remotely as “Traffy”; the planned Caesar hand-off at Green Bit is jeopardized by the impassable 200-year iron bridge and the fighting fish (p. 10).
Dressrosa (Ch. 701) — the Zou Vivre Card; “enemy territory”
- On the Dressrosa coast, gives Nami a Vivre Card pointing to Zou: “It points to Zou, the island we spoke of earlier. If anything happens to us, go there” (p. 6) — establishing Zou as the alliance’s fallback rendezvous. See Zou.
- Warns the loud Luffy they are “in enemy territory now” (p. 2); confirms Greenbit “can’t be reached by water,” necessitating the bridge crossing for the Caesar-handover team (p. 7).
Dressrosa (Ch. 700) — the Warlord lecture; the SMILE-factory decoy; Zou
- On-page confirmation (in Commodore Brannew’s Warlord lecture) that Law is one of the Seven Warlords, “Mastermind of the Rocky Port Incident,” the Surgeon of Death (p. 13).
- Negotiates the Caesar handover with “Joker” (Doflamingo) by Den Den Mushi and authors the decoy plan to find and destroy the SMILE factory — the one datum he “couldn’t glean” (pp. 5–8). See The SMILE Factory Hides Doflamingos True Operation.
- Reveals his people are at Zou when Kin’emon names the same destination (p. 10) — his hidden agenda and the Wano samurai’s voyage converge.
Punk Hazard departure — alliance goes public; reads Doflamingo’s sacrifice (Ch. 699)
- Flees Punk Hazard with the Straw Hats by night aboard the Thousand Sunny; on watch, apart from the crew’s antics (pp. 11, 15).
- The morning paper broadcasts the Law–Straw Hat alliance worldwide (“Warlord of the Sea, Trafalgar Law, forms unprecedented alliance with Straw Hat Pirates,” p. 17). See Eleven Supernovas.
- Privately reads Doflamingo’s play: “Joker” gave up a Warlord plunder-license and a ten-year throne in a single night only to get Caesar back — “Now do you see just how big this deal of ours was? All we did was kidnap Caesar.” (p. 19). See Law’s Alliance Plan Targets A Yonko Via The Punk Hazard Key, Joker The Underworld Broker Backs Caesars Punk Hazard Operation.
Punk Hazard (Ch. 698) — the underworld lecture; the SMILE factory in Dressrosa
- Aboard the Sunny, lays out the New World underworld to the Straw Hats: syndicate-like pirate territories and secret “underground” dealing to avoid the Navy, with Doflamingo as the top broker “Joker” whose biggest client is the Emperor Kaido (pp. 14–15).
- Explains the alliance’s mechanism: capturing Caesar cuts the SMILE supply and weakens Kaido — “Joker’s out of the picture now, so we move on to the next step” (pp. 16–17).
- Names the next target — a SMILE factory hidden in Dressrosa — and cautions “the enemy’s well connected… we can’t be sloppy” (p. 17). See A SMILE Production Factory Hides Somewhere In Dressrosa.
Punk Hazard (Ch. 697) — the alliance plan in full; the ultimatum to Doflamingo
- Lays out the alliance plan to Luffy in full: the target is Kaido, “King of the Beasts,” one of the Four Emperors; candid ~30% chance of success; “our alliance only lasts until we bring down Kaido” (pp. 2–3). See Law’s Alliance Plan Targets A Yonko Via The Punk Hazard Key.
- Warns Smoker (“White Chase”) that being left alive “means absolutely nothing” (p. 3); tells the crew he’ll head to Greenbit next (p. 3); slumps, drained, after the rescued children are seen off (p. 4).
- Takes the captured Caesar as leverage and phones Doflamingo directly by Den Den Mushi: terms are quit the Seven Warlords and abandon Dressrosa by tomorrow morning’s paper, or Kaido learns the SMILE supply is cut (pp. 16–19). Names Kaido as Doflamingo’s “most precious trading partner.” See Law’s Ultimatum Doflamingo Must Quit The Seven Warlords By Tomorrows Paper, The SMILE Trade Binds Caesar Doflamingo And Kaido.
Punk Hazard (Ch. 696) — cured the children; the alliance turns concrete (target: Kaido)
- Revealed to have surgically removed the addictive drugs from the captive children with the Ope Ope no Mi (“cutting their bodies to pieces” for painful rehab) — the children’s “raccoon”/doctor savior (pp. 8–9). Stands apart from the joint party (p. 17) and presses the alliance: warns Luffy they must leave before pursuit arrives, and openly disclaims that he’ll necessarily “keep an oath to a pirate” while probing “what are you using Straw Hat for? What are you starting?” (p. 19). Reacts (”?!”) to Luffy’s declaration to crush all Four Emperors (pp. 19–20). Cross-link Law And Luffy Are Bound By Fate, Law’s Alliance Plan Targets A Yonko Via The Punk Hazard Key.
Punk Hazard (Ch. 694) — the heart-deception revealed
- Reveals his trick to Smoker: he “considerately returned” Caesar’s secretary Monet’s heart to Caesar, who “made that assumption on his own” that it was Smoker’s — turning Caesar’s kill-Smoker move into the killing of his own ally (pp. 14–15). “When you’re nice to others… that good karma comes back around.” See Ope Ope no Mi.
- Reading the gas-clouded exit with the escape party, judges the Structure-D blast “much too small” to be the island self-destruct (p. 10).
Punk Hazard — coordinating the escape (Ch. 693)
Punk Hazard (Ch. 692) — furious at Luffy over Caesar
Punk Hazard (Ch. 691) — cuts Vergo apart; returns Smoker’s heart
- Inside the S.A.D. Manufacturing Room (Structure D), has destroyed the lab and cut Vergo to pieces (pp. 8–9) — the climax of the agenda he concealed even from Joker.
- Returns Smoker’s carved-out heart and tells him to “Focus on your own predicament. Don’t worry about me… This room will blow sky-high soon.” (p. 9).
- Bids Vergo “Good-bye… Vergo the pirate.” (p. 9), framing the disgraced Marine-mole as a pirate. Cross-link Vergo, Smoker, S.A.D..
Punk Hazard (Ch. 690) — reclaims his heart; phones Joker; Vergo falls on him
- Reclaims his own heart from Smoker in the S.A.D. Manufacturing Room — “You’ve got me my heart back, Smoker. …Now we’re even. So finish this!!” (pp. 11–12) — squaring their debt and freeing himself to move openly against Joker.
- Phones Joker (Doflamingo) by Den Den Mushi and gloats that he has destroyed all of Doflamingo’s S.A.D., costing him his “most vital pawn”; throws Doflamingo’s own “new age” rhetoric back at him — “now I’ve destroyed the gears!! And no one can turn back!!!” (pp. 13–14, 19). Implicitly demands Doflamingo “quit the Seven Warlords” (carried into the next chapter).
- Doflamingo retorts that Law has a deep-seated fear of Vergo from “years ago,” when Law “crossed the line with Vergo,” and that Law’s severing powers “can do nothing to the strength of his Haki” (p. 15). Vergo falls on Law with full-body Armament Haki (pp. 15–16). Cross-link Law’s Buried Trauma And Fear Of Vergo.
Punk Hazard (Ch. 689) — referenced: his objective named (the S.A.D.)
- Referenced, not shown. Caesar names Law’s objective: Law is after the S.A.D. and wants to kidnap Caesar because Caesar is the only one who can manufacture it (p. 15). See Law’s Hidden Agenda On Punk Hazard Concealed Even From Joker.
Punk Hazard (Ch. 687) — cliffhanger close-up
- Closes the chapter with a confident close-up smirk (p. 20) — a scene-transition cliffhanger cutting away from the Monet fight.
Punk Hazard (Ch. 683) — fights Vergo in the S.A.D. room; the heart-swap gambit revealed
- Fights Vergo in the S.A.D. Manufacturing Room (Structure D) while injured; uses Room, Chambres (“Return to me, heart!!”, p. 15) and Counter-Shock (an electric shock to a heart, p. 16).
- Reveals his gambit: “I knew exactly how to get my heart back from Caesar. My only failure was not predicting your arrival” (p. 18) — and the heart Vergo holds as leverage proves to be Smoker’s, not Law’s. See Law’s Concealed Agenda Behind The Warlord Mask, Law’s Hidden Agenda On Punk Hazard Concealed Even From Joker.
- Exposes Vergo on-page: “Vergo the pirate!!!” (p. 19).
Punk Hazard (Ch. 682) — destroys the S.A.D. room; revealed as Joker’s former protégé
- Breaches and destroys the S.A.D. manufacturing room (Structure D) in an explosion (pp. 2, 7-9), gates sealing behind him.
- Revealed (via Doflamingo/“Joker“‘s monologue) as a former protégé whom Joker raised “like a little brother, watching over his growth” (p. 7). The G-5 marines realize their “Vice Admiral Vergo” was a planted fake/traitor in league with Law and that the real Vergo they knew “was like a father” to them (pp. 4-5). Now branded a traitor; Joker orders his death “so atrociously, so wretchedly.” See Doflamingo Raised Law Like A Little Brother Shared Past.
- His true, deeper agenda on Punk Hazard remains concealed even from Joker, who reads it only as a rebellion + a grab for the S.A.D. (“The boy is leading a rebellion against us!! Law’s after S.A.D.?!”). See Law’s Hidden Agenda On Punk Hazard Concealed Even From Joker, Law’s Concealed Agenda Behind The Warlord Mask.
Punk Hazard (Ch. 681) — true target unmasked: the S.A.D. room
- A facility broadcast reveals Law has infiltrated the S.A.D. manufacturing room (p. 18). Vergo deduces Law “likely became one of the Seven Warlords… just to get into that room” and “must have joined forces with Straw Hat in order to keep us busy” — i.e. the alliance is a diversion (pp. 18–19).
- Vergo calls Law “that boy” who “has one nightmare of a scenario planned out in his head” and is “going to unleash hell on the New World” (p. 19). See Law’s Concealed Agenda Behind The Warlord Mask, Law’s Alliance Plan Targets A Yonko Via The Punk Hazard Key, S.A.D..
- Recap of the heart-standoff (p. 3): racing toward his target “at the maximum speed… the shortest route here.”
Punk Hazard (Ch. 679) — diagnoses Caesar’s gate-trap
- Reads the closing-gate alarm for Smoker: “They’re trying to trap us in… there’s only one hallway to Structure B up ahead… it’s a warning that the gate is going to shut” (pp. 10–11). His “time limit” (the heart-collateral) is referenced by the marines (p. 11).
Punk Hazard (Ch. 678) — reverses the swap, maps the escape
- Reverses his Ope Ope no Mi body/personality swap, restoring the four scrambled Straw Hats to their own bodies (pp. 9–10).
- Maps the only escape — the “Structure R-66” sea-gate that reaches the sea without touching the outside poison air; gives the group “two hours at best,” plans “something with unpredictable results,” and warns “I have no taste for mass murder… I can’t guarantee your survival” (pp. 11, 13).
- Tells Luffy not to interfere with him or “his crew” — an alliance running on its own terms (p. 9).
Punk Hazard (Ch. 677) — springs the long-laid escape
- Springs his pre-laid escape: he had salted the lab with ordinary (non-sea-prism) chains so that if ever captured he could switch to chains his Ope Ope no Mi removes — the sea-prism cuffs never threatened him. “Do you know how many months I’ve been here?” (p. 10).
- Orchestrates a smoke screen: has Franky torch a docked Marine battleship so the rising smoke blinds Caesar’s wall video Den Den Mushi and hides the breakout from the underworld brokers (pp. 8-9).
- Frees Luffy, Smoker, and Tashigi; sets terms on Smoker — “This isn’t a request, it’s a demand”: forget everything about Law and “Joker,” and “if you get out alive and ruin Vergo’s reputation, that suits my ends” (p. 12). See Law’s Hidden Agenda On Punk Hazard Concealed Even From Joker.
- Broods over his hostages and his unresolved heart: “…with you two? Now, what to do about my heart…” (pp. 16, 20); the final panel is his “DEATH”-tattooed hand.
Punk Hazard (Ch. 676) — calls the counterattack from inside the cell
- Among the captives as Caesar’s gas demonstration runs; gloated over as the captured Warlord of the Sea (p. 17).
- Springs the move: “…we’re not getting held up at THIS stage, Straw Hat!! Stick to the plan… and don’t screw it up this time!!” / “Time for the counterattack” (pp. 18-19).
- Flags the one complication in his pre-laid plan: “I wasn’t accounting for Vergo’s appearance” (p. 19). See Law’s Hidden Agenda On Punk Hazard Concealed Even From Joker.
- A piece of paper is thrown to the captive group, who are told “Don’t do anything” (pp. 18-20) — the opening beat of the breakout that pays off in Ch. 677.
Punk Hazard (Ch. 675) — the collateral heart crushed
- Captured in Caesar’s lab; Vergo crushes the heart Law gave as collateral and Law appears to take the damage (pp. 9-11).
- Flashback to the Law–Caesar deal: Caesar demanded “you will give your heart to me!!” so “we each have our hands at the other’s neck” (pp. 7-9).
- Caesar exposes that Monet shape-shifted to follow Law and overheard his whole plan (p. 10). Luffy marvels Law is alive despite the missing heart — and Caesar claims “I’ve got it RIGHT HEEERE!” — leaving the true location of Law’s heart ambiguous (p. 11).
Punk Hazard (Ch. 673) — captured; exposes Vergo; names Joker as Doflamingo
- Captured alongside Luffy, Smoker, and Tashigi in a cell inside Caesar’s lab (pp. 16-18).
- Exposes Vergo as a pirate who “enlisted on Joker’s orders” — “Joker’s man from the very start” — and reveals “Joker” to be the Warlord Donquixote Doflamingo (pp. 17-19).
- First disclosure of his hidden past: “that’s how I know Vergo… when I worked for him” (p. 19) — Law once served under Doflamingo. See Law Once Served Under Doflamingo As Joker.
Punk Hazard (Ch. 672) — ambushed and beaten by Vergo
- Weakened and on the ground behind the lab, Law is confronted by the newly arrived Vergo (“Vergo!! When did you… get here?!” — p. 3). Vergo reveals Joker’s side never trusted Caesar and planted Monet, that he came from Dress-rosa on an S.A.D. tanker, and that “you can’t hide things from us adults, Law” (pp. 2-3).
- Law attempts to grab/eliminate him (“Then… I’ll just have you disappear!!”) but is brutally beaten — Vergo demands “It’s Mr. Vergo to you” and “Learn your place…” (pp. 3-4). Law is left bleeding; his double-game on the operation is exposed.
Punk Hazard (Ch. 671) — “seen everything”; coerces Monet; a figure from his past
- Announces he has “seen everything I want to see” on the island and is “planning to leave soon” (p. 4).
- Coerces Monet into accompanying him: “Mind coming with me? But before that, I want to make use of your powers…” (p. 5).
- Cliffhanger: inside the lab a tall figure from his past greets him — “My, how you’ve grown, Law. How many years has it been?” — seeding Law’s hidden backstory / a prior affiliation (p. 17).
Punk Hazard (Ch. 669) — commences the capture operation
- Commences the capture operation against Caesar: uses his Devil Fruit to warp Luffy’s boarding party to the lab’s rear entrance (“Did we just warp?!”, p. 15) and launches Luffy to the front as a “shortcut” (pp. 16–17).
- States there is “a reason why I can’t just do that” (capture Caesar himself) — “It’s why I’m teaming up with you people” — and that he will “study the drug” while the Straw Hats handle the fighting (p. 15). Reinforces the concealed-agenda thread.
Punk Hazard (Ch. 668) — the alliance is sealed; the kidnap-Caesar plan; restores the bodies
- Formally forms the Heart–Straw Hat pirate alliance: lays out that with the right order of operations they can “take down one of the Four Emperors,” accepts Luffy’s terms — “Make sure the rest of your crew is on board with the plan. Then I will accept your wishes” (pp. 2, 13). See Pirate Alliance.
- Restores the scrambled bodies with “Chambres” (Shambles): Franky, Nami, and Chopper returned to their own bodies; Sanji left “absent” (in Chopper’s body, off seeking the samurai) (pp. 6–7).
- Explains the captives’ forced gigantism as a centuries-old WG super-soldier program (p. 8); profiles Caesar (former WG scientist, Logia gas-gas, ฿300,000,000, “weapons of mass murder,” p. 11); names the plan’s first move — capture/kidnap Caesar to sow confusion, “not money… but confusion” (pp. 12–13). See Artificial Gigantism.
- Names the alliance’s Haki users for the kidnap job: Law, Zoro, Sanji, Luffy (p. 12).
Punk Hazard (Ch. 667) — Counter Shock rescue; the shocking alliance offer
- Drops onto the icy mountains and blasts the fleeing Yeti Cool Brother carrying captured “Nami” (Nami’s mind in Franky’s body) with Counter Shock, saving her (p. 17).
- Deliberately seeks Luffy out — “I thought it over… and I’ve come to talk to you, Straw Hat” — and lays out his New World doctrine: “There are two ways to survive on this sea… affiliate yourself with an Emperor… or try to be one” (pp. 18–19). See Four Emperors (Yonko).
- Reveals Punk Hazard “harbors a crucial key powerful enough… to throw the New World into disarray,” and makes the shocking alliance offer: team up “to take down one of the Four Emperors!! I have a plan…” (pp. 19–20). See Law’s Alliance Plan Targets A Yonko Via The Punk Hazard Key, Law And Luffy Are Bound By Fate.
Punk Hazard (Ch. 666) — the Law–Caesar pact laid bare; Op-Op Fruit named; leaves at will
- Appears in person in Caesar’s laboratory; the Law–Caesar arrangement is laid out — Law gets free run of the lab and island and heals the gas-crippled ex-prisoners, in exchange for keeping Caesar’s fugitive presence secret. Caesar: “you will NOT tell anyone that I am here. That includes Joker.” (p. 5)
- First on-page printing of his fruit’s name — Monet’s dossier: “Trafalgar Law. From the North Blue. The Surgeon of Death. Op-Op Fruit. You’re a doctor.” (p. 6) See Ope Ope no Mi.
- Clicks his weapon at Caesar twice, suspicious Caesar might “screw it all up”; agrees the captives’ presence is a problem (“You didn’t call him here, did you…?”). (pp. 4, 7)
- On Caesar drugging children with addictive candy, Law mutters “You remind me of someone else…” (p. 7) — a character tell toward his unrevealed past.
- Leaves the lab freely via the rear entrance despite the Navy being “in this area” — “…wherever I wish. I’m free to go…” (p. 17), demonstrating the latitude his pact buys him. See Law’s Hidden Agenda On Punk Hazard Concealed Even From Joker.
Punk Hazard (Ch. 665) — recites the board state; Smoker’s heart is the “gift” to Caesar
- In the snow behind the lab, Law stands over a still-beating heart and recites the board state: “Heart… Vice Admiral Smoker’s… Naval Base G-5… Caesar Clown’s Laboratory” (p. 16).
- The heart he carved from Smoker last chapter is implied to be the “very thoughtful gift” Caesar says “should seal the deal” (p. 17) — Law is feeding the Master leverage while concealing his own agenda. See Law’s Concealed Agenda Behind The Warlord Mask.
Punk Hazard (Ch. 664) — the “second savior”; origin of the centaurs; holds Smoker’s heart
- Revealed (via Brownbeard’s account) as the Warlord “second savior” who, a few months ago, grafted new legs from living animals onto Punk Hazard’s crippled prisoners — the origin of the island’s centaurs and the bird-woman Monet (pp. 15-16).
- Currently controls Smoker’s heart and body; Brownbeard expects Law to come rescue him (p. 7, p. 11). “He left the room already.”
Punk Hazard (Ch. 663) — treats Luffy; the 100-hearts Warlord credential; the bisected-samurai reveal
- Treats Luffy’s wounds “on a sudden whim,” prescribes two weeks’ rest, then warns: “You and I are both pirates. Don’t forget that… in our search for the One Piece, we’re enemies — but there are lots of other people I owe for their help two years ago” (pp. 4-5). See What is the One Piece.
- Confirmed to have earned his Warlord title within the last two years by sending 100 pirate hearts to Marine Headquarters (p. 6) — payoff of the Ch. 659 reveal.
- Effortlessly downs Vice Admiral Smoker and Tashigi with his power, then withdraws around the back of the lab, telling Luffy “we each have something to regain… I’m sure we’ll meet again. You’ll find what you’re seeking there” (pp. 7-8). Seeds the Luffy-Law alliance.
- Named on-page (p. 17) as the man who cut the Wano samurai into three living pieces — “locking my head inside [a dragon’s head], leaving my torso to rot, and sending my legs to be fed to wild beasts.” His Ope-power keeps the parts alive. See A Living Bisected Samurai On Punk Hazard Points To An Unrevealed Devil Fruit.
- End of chapter: implicated as acting for/with the hidden “CC” — Caesar Clown (p. 19); the samurai’s torso-half (Brook) and Smoker both want “a bone to pick” with him over the operation.
Punk Hazard (Ch. 662) — Warlord vs. Vice Admiral; extracts Smoker’s heart; the Luffy reunion
- Holds a Seven Warlords seat (“Warlord Law”), operating on Punk Hazard apparently in service of “the Master” (pp. 1, 11).
- Cuts Smoker and Tashigi in two with Room and survives a G-5 volley by switching the Marines’ bullets with the surrounding snow — “Those are your bullets” (p. 4).
- Detaches, swaps, and slices without killing — Shambles leaves the Marines/Tashigi with mismatched body parts (“your right hand’s my left foot!”, p. 14).
- Notes the “unpleasant energy” of Smoker’s sea-prism-stone-tipped jitte (p. 7).
- Calls “Scalpel!” and carves out Smoker’s still-beating heart, sealing it in a cube as the Vice Admiral collapses (pp. 17–18); refuses to reveal his plans — “I don’t have to tell you a single thing” (p. 19).
- Was “only supposed to drive the Navy away,” not battle them — his fight has exposed the island (p. 11); Smoker intuits “there’s someone else behind it.” See Law’s Concealed Agenda Behind The Warlord Mask.
- Recognizes Luffy on arrival (“Straw hat…”) — first meeting since Marineford; the chapter closes on his full-page silhouette (pp. 19–20).
Punk Hazard (Ch. 661) — Op-Op Fruit named; “Surgeon of Death”; the Warlord contract invoked
- Confirmed on-page as one of the Seven Warlords of the Sea: the G-5 Marines invoke his contract while he attacks them — “The Seven Warlords answer to the government!! You’re breaking your contract by attacking us, Trafalgar!! …They’ll strip your title!!” (p. 15). (His seat was first revealed Ch. 659; here the Marines press the contract as he openly breaks it.)
- Fights Vice Admiral Smoker and the G-5 unit (incl. Tashigi) at the laboratory’s front entrance, having cut their warship in half and fused half of it to the island — “It’s like some kinda weird sculpture!!” (p. 15).
- Uses “Scan” to confiscate every Marine transponder snail — “Nothing you’ve seen on this island… will be reported to Naval HQ or the government” (p. 16) — burying all outside witness of the island.
- Uses “Chambres” to relocate/scramble the escaping group (Sanji, Franky, the giant children, the samurai) out of the Marines’ reach (pp. 13-14).
- His Devil Fruit is named on-page for the first time — the Op-Op Fruit — and he is called a “modification man” (p. 17). The “Room” is spelled out as his operating room: “anyone inside Law’s sphere is a helpless patient on his operating table!! …The Surgeon of Death!!!” (pp. 18-19). Tashigi charges him sword-drawn as the chapter ends. See Ope Ope no Mi, Trafalgar Law Room Body-Swap Power Combat-Debut.
Punk Hazard (Ch. 660) — the lab-entrance standoff; “Room”/“Takt” traps the Marines
- The chapter title canonizes his standing — “Trafalgar Law, Warlord of the Sea.” (His Warlord reveal itself was Ch. 659; this chapter foregrounds it.)
- At the laboratory’s front entrance he faces Smoker and the G-5 marines. He recognizes them from Sabaody and lets Smoker recite his record — Sabaody, the Paramount War, and the Roswald Celestial-Dragon incident where he “helped [Luffy] escape” — then dismisses the distress call as a falsified S.O.S. trap (pp. 11–13). See Law And Luffy Are Bound By Fate.
- Claims the abandoned government island as his own: “It’s my vacation home now… You abandoned this island. Why can’t a pirate like me do what I wish with it?” Refuses to let Smoker inspect the lab (pp. 12–13).
- Uses “Room” / “Takt” to lift a ship and a huge slab of the frozen riverbed into midair, refusing to let the Marines (or anyone) leave the island; threatens to “dismantle you limb from limb” (pp. 17–19). See Trafalgar Law Room Body-Swap Power Combat-Debut.
Punk Hazard (Ch. 659) — revealed as a Warlord of the Sea; the island is his base
- Revealed as one of the Seven Warlords of the Sea, occupying Punk Hazard as his base. The lab door opens on Law, nodachi over his shoulder — “This is my mansion now… what do you want?” (p. 18). Caption: World Government Recognized Pirate Warlord of the Sea — Trafalgar Law · Former Bounty: ฿440,000,000 — raised during the timeskip from his ฿200M debut bounty, then frozen on Warlord induction.
- The G-5 marines recoil: he became a Warlord by sending 100 pirate hearts to Marine Headquarters (p. 19) — “He’s a madman!”
- Before revealing himself he hides his ships from the approaching battleship — “Don’t let them see you! I cannot emerge, either!” (p. 16) — then chooses to open the door on Smoker.
- Greets Smoker by epithet (“White Chase…”) and ends the chapter in a standoff: Smoker — “This island is off-limits, Law… that includes government men”; Law — “Then it applies to you too.” (p. 19).
Post-War (Ch. 595)
- At Sabaody Archipelago, lounging on his submarine, Law refuses his crew’s demand to rush back to the New World: “The One Piece isn’t going anywhere. I said we should wait for the right time” (p. 3).
- Refuses to be drawn into Blackbeard’s rampage — “If they want to kill each other, let them. I’m not going to get mixed up in any pointless fights” — and states his ambition: “I’ll take my rightful place when the time comes!” (p. 3). An early seed of Law’s New World designs.
Post-War — leaves Amazon Lily (Ch. 591)
- Confirmed as “the reason you’re alive” — treated and saved Luffy, prescribed ~2 more weeks’ rest, then departed by sub before Rayleigh arrived (pp. 2–6).
- Encountered Rayleigh swimming the Calm Belt (recognizes him from Sabaody, p. 3). Submerging, muses: “It seems a ‘D’ will always attract a storm” (p. 6). See Will of D.
Post-War — treating Luffy on Amazon Lily (Ch. 582)
- His Heart Pirates are granted a men-ban exception to anchor in Amazon Lily’s Rocky Bay so Law can treat Luffy’s injuries (p. 5); Law goes off with Jinbei to handle the rampaging patient (p. 8).
Post-War (Ch. 581)
- Surfaced his submarine beside Hancock’s ship and reported on Luffy: survived surgery, accumulated damage, survival uncertain (pp.9-10).
- Uncharacteristically meek before the Pirate Empress (“He’s so meek!!”), to his crew’s shock (p.9).
- When Jinbei thanks him, he shrugs off motive — “I didn’t have to help him… There are times when people act instinctively” — and leaves rather than stay (p.12).
Marineford — the Surgeon of Death extracts Luffy (Ch. 579)
- Surfaces his submarine at Marineford to take in the dying Luffy and Jinbei — “He’s come to Luffy’s aid in a submarine!! He’s in cahoots with Straw Hat!!” (pp. 2–3).
- Kizaru arrives to stop him (“I’ll get you for running away from me at Sabaody… Trafalgar Law”); Law dives away with Jean Bart catching the rescued pair (pp. 10–11). Named on-page “Law, the Surgeon of Death.”
Marineford (Ch. 578)
- Surfaces his submarine amid the war and offers to take the dying Luffy aboard and treat him — “Leave him to me!! I’m a doctor!!” — framing the rescue as “the work of fate” and foretelling they “may become enemies in the future.” First time Law materially intervenes in Luffy’s story (pp. 18-19). See Law And Luffy Are Bound By Fate.
Sabaody / Summit War — leaves Sabaody (Ch. 565)
- At Sabaody amid the cut-feed broadcast chaos, coolly weighs “the chance of the Whitebeard Pirates surviving is…” and orders the Heart Pirates out: “Get the ship ready, Bepo… Come with me, Jean Bart” (p. 3).
Sabaody Archipelago (Ch. 510) — named as a Marine target (not shown)
Sabaody Archipelago — the Kuma encounter (Ch. 506)
- Clashes with the Marines alongside his crew (incl. the talking bear Bepo) and encounters the Warlord Bartholomew Kuma; quips “I really don’t want to add an admiral to the list” (pp. 2-5). Friction with Eustass Kid — Law: “Trafalgar, you’re getting in my way!”
Sabaody Archipelago — “Room” combat-debut; frees Jean Bart (Ch. 505)
- Devil-Fruit power shown for the first time: marks a “Room” sphere and severs/swaps Marine bodies harmlessly — severed heads keep talking, torsos and feet end up mismatched (“ROOM.” / “It’ll all be over soon. Relax.”); warns the others not to enter his circle (pp. 3-4, 7). Fruit unnamed on-page. See Trafalgar Law Room Body-Swap Power Combat-Debut.
- Fights the Marine assault back-to-back with Luffy and Eustass Kid (pp. 2-13).
- Removes the exploding slave-collar from a captive and frees Jean Bart — a former pirate captain enslaved by the Celestial Dragons — who pledges to serve him; Law tells him to “save half of your thanks… for the Straw Hat” (p. 18).
- Leaves with his crew, called out by his polar-bear navigator Bepo (pp. 13-14).
Sabaody Archipelago — joins the breakout; “Room”/“Shambles”/“Slice” (Ch. 504)
- Sizes Luffy up after the chaos — “I got to see just how crazy Straw Hat Luffy is. The rumors were right!” — but “I don’t want to deal with an admiral” (p. 14).
- Joins the three-captain breakout; warns Eustass Kid, “I’ll obliterate you if you tell me what to do again, Eustass” (p. 15).
- Reveals his spatial Devil-Fruit powers — “Room,” “Shambles,” “Slice” — slicing apart the Marine cannon fire (pp. 18-19). Bounty 200,000,000 reconfirmed (p. 15).
Sabaody Archipelago — the auction-house brawl (Ch. 503)
- Watches the uproar from the audience (spotted fur hat, sardonic), accompanied by his bear companion (unnamed on-page); identified by an onlooker — “You must be Trafalgar Law… he’s a pirate” (p. 14).
- Coolly addresses the crew after Luffy’s punch — “Thanks for the laughs, Straw Hat pirates.”
Sabaody Archipelago (Ch. 501)
- At the Grove 1 Human Grand Auction: seen bidding in the crowd (spotted fur hat, p. 6) and grinning at the Straw Hats’ antics (p. 17).
Sabaody Archipelago (Ch. 500)
- Present at the Sabaody Human Auction Hall waiting room, lounging with his large bear companion; an onlooker notes “lots of bad stories about him” and “bad manners.” Named on-page “Trafalgar Law from the North Blue,” ฿200,000,000 (p. 16).
Sabaody Archipelago (Ch. 498) — first appearance
- Coolly menacing — asks X Drake “How many people have you killed?”; laments a halted brawl (“Too bad. Things were just getting good…”).
Punk Hazard (Ch. 695) — outed as Joker’s former “Heart”
- Joker’s agents Buffalo & Baby 5 recognize Law on sight: “Joker’s still holding the HEART seat open for ya?!” / “Law!! Are you really turning against Joker?!” (p. 9) — establishing Law as a defected high-ranking member of the Don Quixote family (Donquixote Pirates), retroactively framing his Warlord cover + Caesar deal as a vendetta against his former master. See Trafalgar Law Was Joker’s Heart In The Donquixote Family.
- His alliance with Luffy completes “stage one” — Caesar recaptured (p. 19).
Dressrosa — recovering at Kyros’s house (Ch. 796)
Dressrosa — the escape; the truth told to Sengoku (Ch. 798)
- Aboard the escape, confesses to Sengoku that he was the dying white-lead boy on Minion Island: “It was me.” Lays out the four things lost that day — the Barrels Pirates, Corazon’s life, the Op-Op Fruit, and himself (p. 8).
- States he lived to strike down Doflamingo for Corazon: “I got both my life and my heart from him! I owe him everything!!!” (p. 9).
- Reveals his hidden “D.” to Sengoku — “just like Straw Hat’s” — and asks about the “D”; says he doesn’t know if it’s the “D way of life” Cora wanted for him (pp. 9–10). See Will of D, Corazon’s Dread of the D Marks Law’s Hidden Lineage.
- Sengoku releases him instead of arresting him. Law then directs the Dressrosa escapees: “It doesn’t matter where you’re situated, your fate will be the same!! Get the ship moving!!” (p. 14).
Zou arc (Ch. 803)
- Reaches Zou — the place he earlier said “my people are there” (the Mink Tribe / his crewmate’s homeland); climbs the elephant with Luffy’s group (pp. 12-13).
Zou (Ch. 804)
- Reaches Zou with Luffy’s group — the destination he first named back at Ch. 700 (“My people are there”). Climbs the elephant’s leg to the country atop its back.
- Senses the aftermath of an attack: “faint traces of gunpowder… and maybe gas” (p. 15).
- Helps identify the ambushers: “They’re Minks” (p. 18).
Wano Country — Onigashima Raid (Ch. 987)
- Reported among the storming raiders (“the former Warlord Law”), part of the multi-faction force the Beasts realize is “all working together.” (Page 15)
Wano Country — Onigashima raid (Ch. 996)
- On the Second Basement floor, tells Nico Robin his full true name — “Trafalgar D. Water Law” — recalling Corazon’s teaching that the people of the D are “the enemies of the gods” (pp. 11–12).
- Agrees with Robin that the only road to the answers is the red stones (Road Poneglyphs), “and that means beating the Four Emperors”; declares “I want to know the meaning of this checkered fate. …Hey, Cora. I’ve made up my mind.” (p. 12).
Wano Country — Onigashima Raid (rooftop) (Ch. 1000)
- Reaches the rooftop with the supernova alliance (p. 10); at Luffy’s request (“Traffy! Send them all down below!!”) uses his Room to drop the wounded Scabbards off the roof to safety (p. 15).
Wano Country — Onigashima rooftop (Ch. 1002)
- Drives Gamma Knife into Kaido’s interior — an internal-destruction attack bypassing the dragon’s outer toughness; works from guesswork (“I’ve never seen an anatomical chart of a dragon… but I’d guess the heart… is right about here”) (p. 7).
- Comic beat: refuses to keep ferrying allies with his Room — “I am not your personal servant!!! First them, now you?!” — before Luffy demands a launch (“Traffy, shoot me up there!!”) (p. 11).
SBS reveals
Zou (Ch. 805)
Onigashima Raid — Rooftop (Ch. 1001)
- Uses Chambres, Room, and Takt in the combined assault; plans a “surgical death” by going “straight inside the body” to bypass Kaido’s tough skin (pp. 7, 11-15).
- Bickers with Kid over who is whose “henchman” (“I would NEVER!!!”); was already planning to send the samurai/scabbards down to the Live Floor (pp. 7-8).
Wano Country — Onigashima Raid, rooftop (Ch. 1003)
- Diagnoses Luffy’s collapse as the cost of his giant technique: “No, it’s a side effect of that cannonball-like technique!! He won’t be able to use Haki for about ten minutes!!”
Wano Country — Onigashima Raid (Ch. 1008)
- Rooftop strategist: “we’re up here thinking of how to win”; with Zoro and Kid, “We should peel them apart” (pp. 15–16).
Wano Country — Onigashima rooftop (Ch. 1009)
- Cannot simply teleport an Emperor out due to their Haki (“I would have done that already if I could!!”, p. 7), but sets up Room (“It’s all ready!!”, p. 14), shambles Big Mom away with “Chambres!!” (p. 15), then uses “Takt!” to help fling her off the roof (p. 18).
Wano Country — Onigashima Raid (rooftop) (Ch. 1010)
- Uses his powers (“Anti-Bacterial Curtain,” p. 4) to throw the dragon-form Kaido off-balance and keep the two Emperors apart.
- States the plan logic: the goal is to separate Kaido and Big Mom, and “the plan might as well be a failure if anyone dies” — so he returns Prometheus to save Big Mom rather than let her die (p. 5).
- Teleports Kid and Killer to take over the Big Mom side (“we’ll deal with Big Mom!!”).
Wano Country — Onigashima Raid (Ch. 1011)
- Decides to leave Luffy one-on-one with Kaido and relocate everyone else down through the castle (his teleport/“Shambles”) so Big Mom can’t rejoin the Emperor — “I’m leaving you here alone and taking everything else, Straw Hat!!” (pp. 5-6).
Wano Country — Onigashima Raid (Ch. 1012)
- Carried the gravely injured Zoro down off the rooftop; via a mid-air switch (Room/Shambles) lands him in Sanji’s care.
- Lists Zoro’s injuries — “20 or 30 broken bones” — and gives triage instructions (splints, head up, keep him conscious and breathing).
- On the rooftop fight: “He’s gonna win!! It seemed like he’d figured something out…”; trusts Luffy is okay up there.
Wano Country — Onigashima (Ch. 1040) — co-defeats Big Mom
- Calls a fresh Re-Room and mocks Big Mom’s coming death scream; “Let me give you a hand and send you on your way to hell!!!” (p. 5).
- With Kid, lands the combined attack that — together with the single (Yamato-frozen) armory bomb — defeats Big Mom, blowing the bottom off Onigashima and dropping her into the sea — co-winner of the Performance-Floor battle (pp. 13–14).